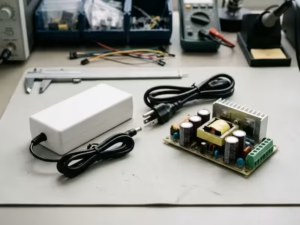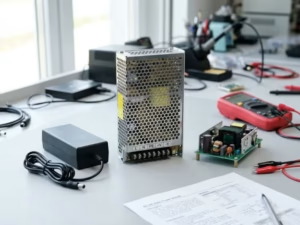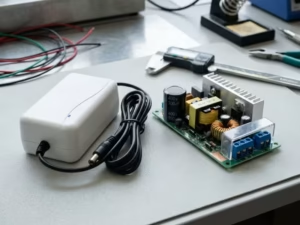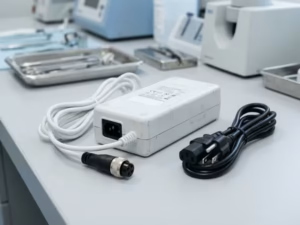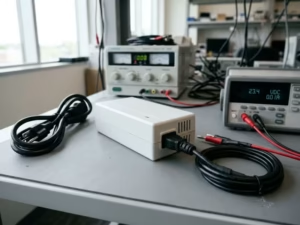
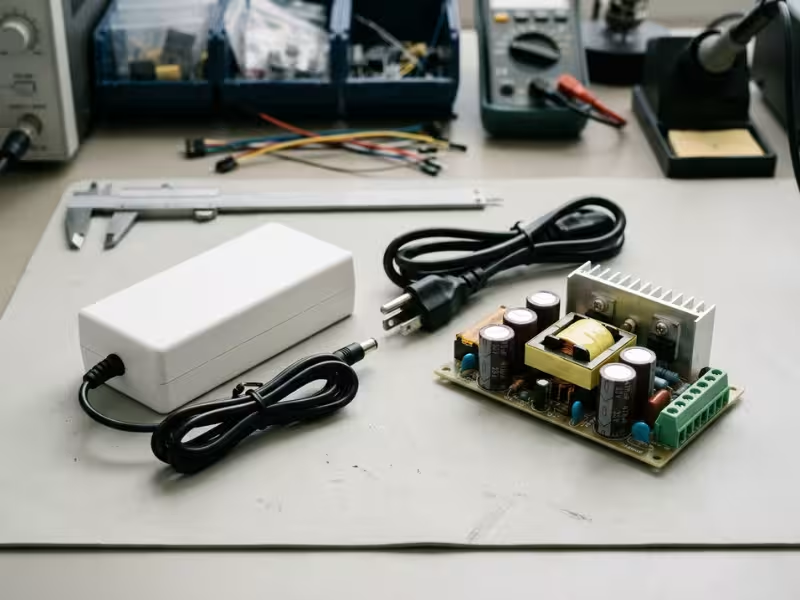
Many OEM teams treat this as a packaging choice. Put the power supply in a brick, or put it inside the box. On a whiteboard, it looks simple.
It isn’t. This one decision determines where heat, certification work, field service, regional SKUs, and user setup end up: inside your product or outside it.
I have helped many OEM teams work through this decision. Most of them started by asking which option costs less. That’s the wrong first question.
This guide gives you a practical framework for making the right call before you freeze the enclosure, especially when you compare different power supply products for OEM equipment.
Why This Choice Reaches Far Beyond the Power Section
When a team asks me “brick or built-in?”, I don’t open the power schematic first. I ask for three things: the enclosure drawing, the list of target markets, and the service plan. The real answer usually sits in those documents.
That’s because the power architecture shapes five parts of the product at once:
- Enclosure design. An internal supply needs an AC inlet, board space, creepage distance to nearby metal, and often a fire enclosure. An external adapter needs only a DC jack.
- Thermal management. A 60 W supply running at 90% efficiency turns about 6.7 W into heat. If the supply sits inside the product, all of that heat stays in your box.
- Safety certification path. With an internal supply, mains voltage enters your product, and the whole device faces mains-level safety evaluation. A pre-certified adapter carries much of that burden outside the chassis.
- Service model. A failed adapter means shipping a $10 part. A failed internal supply often means a full unit return and a bench repair.
- Regional SKUs. An internal universal-input design can ship as one product with regional AC cords. An external adapter may need a separate SKU for every plug type, unless you plan interchangeable plug clips from the start.
Get this choice wrong, and the damage rarely stays inside the power section. It shows up as field failures, higher support costs, a reworked enclosure, and a second trip through the test lab.
Here’s a case that shows how fast it happens.
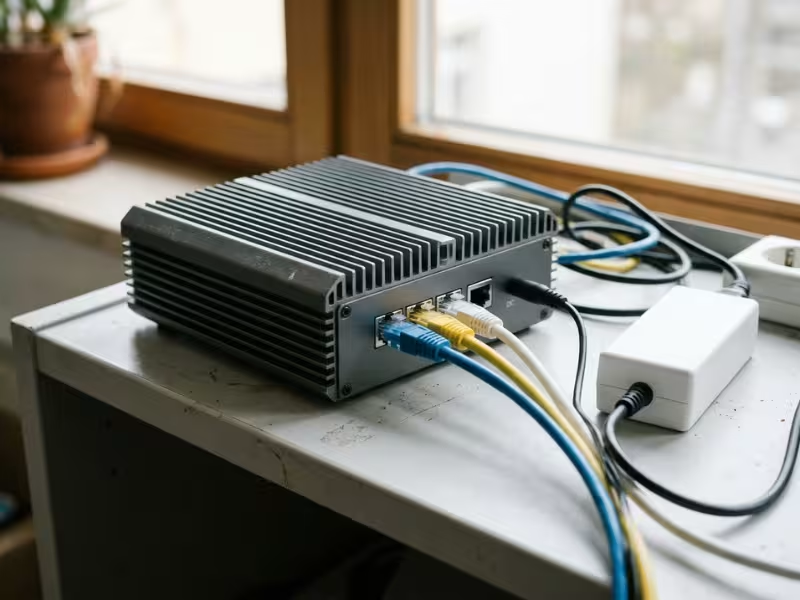
A team designed a fanless network gateway in a sealed aluminum case. The product drew about 40 W. Marketing wanted a clean, one-cable setup, so the team moved the supply inside. On paper, the thermal budget looked fine.
In practice, the internal supply added about 5 W of heat right next to the processor. Internal air ran 12°C hotter than the first prototype. On summer afternoons, the processor throttled and dropped connections. Customers called it a firmware bug.
The fix meant going back to an external adapter. That required a new rear panel, new tooling, and fresh safety and EMC testing. The team lost four months, all to save one cable.
So treat this as a whole-product decision, not a line item on the power page. It affects nearly every other team on the project.
Start With the Real Product Profile, Not a Preference
Every team I work with walks in with a lean. Industrial designers want one clean cord. Hardware engineers want the heat out of the box. Sourcing wants the cheapest quote. None of those preferences answers the real question.
So I set them aside and build a short product profile first. Three parts of that profile settle most of the decision before anyone debates aesthetics.
Wattage and Peak Load Point You in a Direction
Power level gives you the first strong signal. Treat these ranges as directions, not hard rules:
- Under about 65 W: External adapters usually win. Routers, small monitors, label printers, and handheld medical devices fit here. The adapter stays small, and the heat it removes makes a real difference in a compact product.
- About 65 W to 150 W: This is the gray zone. Laptops, POS terminals, and benchtop instruments go either way. Thermal budget and service model decide it.
- Above about 150 to 200 W: Internal supplies start to make more sense. An external brick at this level gets heavy and warm. The DC cable also has to carry high current. A 240 W load at 12 V pulls 20 A, which needs a thick cable and a solid connector.
Don’t size from the average draw alone. A 50 W device with a motor that briefly pulls 120 W needs an adapter rated for that peak. A brick sized for the peak may end up larger than an internal supply would have been.
Where the Product Lives and Who Fixes It
Wattage narrows the field. The use environment often makes the final call.
Picture where the product actually sits. A desktop, portable, or home device usually suits an external adapter. Users plug it in themselves, and they can swap a failed adapter without opening anything.
An industrial cabinet tells a different story. An electrician wires the product into a panel, often on a DIN rail. A dangling brick has no good place to go, and it can get knocked loose by vibration. Medical carts sit in between. Many teams mount one internal supply on the cart to avoid a tangle of adapters near the patient.
Then ask two practical questions:
- Who replaces a failed power part? If the end user does, an external adapter keeps returns cheap. If a trained technician services the product on site, an internal module with a quick-swap design can work just as well.
- Who manages the cables? Consumers lose adapters, mix them up, and coil cords too tightly. Installers in a control room route cables once and leave them alone.
How Long It Lasts and How Far It Ships
The last part of the profile looks ahead. It covers market reach and product life.
Single region or global? A product sold only in North America can ship with one fixed-plug adapter. A product sold in 20 countries needs either an adapter with interchangeable plug clips or an internal universal-input supply with regional AC cords. Each path changes your SKU count, packaging, and warehouse plan.
Short life or long service? Consumer electronics often turn over every two to three years. A cheap external adapter matches that cycle well. Industrial and medical equipment may stay in service for 10 years or more. Over that span, you need spare parts, change control, and a supply that won’t go end-of-life halfway through. An internal supply you’ve qualified once may serve you better than an adapter model that changes every few years.
Consumer or professional? Consumers accept an external brick as normal. Professional buyers often expect a single AC inlet and a power switch on the back panel. That expectation matters when you sell into labs, factories, and hospitals.
Write these answers on one page before anyone sketches the enclosure. When you know the wattage, the environment, the service model, and the market reach, the right architecture usually becomes clear. The design team’s preference should come after the profile, not before it.
When an External Power Adapter Is the Smarter Call
An external adapter doesn’t make your product simpler overall. It moves complexity out of the chassis and into a separate box that sits on the floor, in a drawer, or in a customer’s bag. For the right product, that trade works well. For the wrong one, the problems come back later as support calls.
Here is where the adapter clearly wins, and where it costs you more than the quote shows.
It Takes Heat and Mains Voltage Out of Your Box
This is the biggest advantage, and it matters most in small, sealed, or fanless designs.
Every watt the supply loses becomes heat somewhere. With an adapter, that heat stays in the brick, not next to your processor or battery. In a compact device with no fan, removing even 4 to 6 W can lower internal air temperature by several degrees. That margin often decides whether the product runs at full speed in July or throttles.
The safety benefit matters just as much. When the adapter handles AC-to-DC conversion, your device only sees low-voltage DC, often 5 V, 12 V, 19 V, or 24 V. That changes your design in practical ways:
- No AC inlet, fuse, or line filter on your main board
- No mains-level creepage and clearance to fit around your layout
- Simpler enclosure rules, because a low-voltage product usually faces lighter fire and touch-safety requirements
- A smaller board, since the bulky transformer and bulk capacitors live elsewhere
I see this pay off most in routers, gateways, small displays, handheld instruments, and home medical devices. In these products, the board team gets space back, and the thermal budget stops being the bottleneck.
Service Gets Cheaper and Faster
Power supplies sit near the top of most failure lists. With an adapter, a power failure stays a small event.
The customer unplugs the dead adapter and plugs in a new one. Nobody opens the product, ships it to a repair center, or waits two weeks. A replacement adapter might cost you $8 to $15 plus postage. A full unit return can easily cost $80 to $150 once you add freight, bench time, and a loaner unit.
It also makes your spare strategy easier. You can:
- Stock adapters as a separate service part across several product models
- Ship spares in a padded envelope instead of a full carton
- Sell extra adapters as accessories, for a second office or for travel
- Let distributors keep a few on the shelf without tying up money in full units
For products sold through retail or used by people with no technical help, this point alone often settles the decision.
The Friction You Pick Up Outside the Box
None of that complexity disappears. It just moves to a part you no longer fully control once it ships.
Desk and floor clutter. A 90 W brick sitting on carpet next to four other bricks looks cheap. It also takes up two outlet spaces on a power strip. If your buyers care about a clean setup, they will notice.
Cable wear. Users wrap the cord tightly around the brick, pull it out by the cable, and roll chairs over it. Most adapter failures I review start at the DC strain relief. Ask your supplier for flex test data at both cable ends, and choose a molded strain relief over a basic grommet.
Wrong replacements. A lost adapter often gets replaced by whatever sits in the drawer. A standard 5.5 × 2.1 mm barrel will happily accept a 19 V laptop charger on a 12 V device. Reverse polarity is another risk. If a mismatch could damage your product, use a keyed connector or an uncommon barrel size, and add reverse-polarity and overvoltage protection on the device side. This is also where many teams start looking at custom power adapters instead of forcing a standard adapter into the wrong use case.
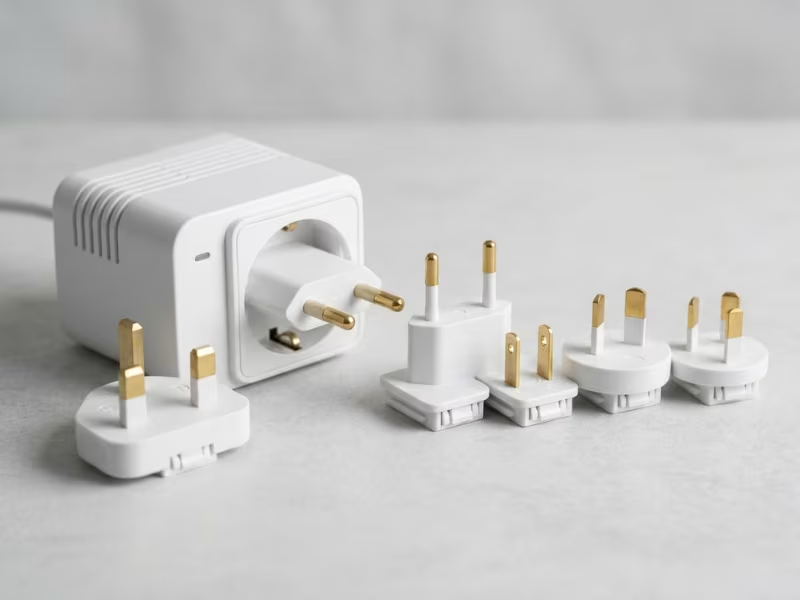
Regional plug SKUs. A fixed-plug adapter needs a different version for North America, Europe, the UK, Australia, and China. That means five part numbers, five packaging variants, and five piles of inventory to forecast. Interchangeable plug clips cut this down to one adapter body plus a few clips. Plan for them early, because adding clips later often means a new housing and a new round of approvals.
So, choose an external adapter when heat, board space, and easy service matter most. Just treat the adapter, cable, and plug kit as part of your product design. If you treat them as an afterthought, they become the first parts your customers complain about.
When an Internal Power Supply Is the Better Choice
Many teams choose an internal supply because it “feels more premium.” That’s a weak reason on its own. An internal supply makes sense when your product can absorb the heat, the safety work, and the service burden that come with it. If it can, you gain real control. If it can’t, you pay for that control later.
Here is where the internal route earns its place, and where it raises the stakes.
It Handles Higher Power Without a Brick on the Floor
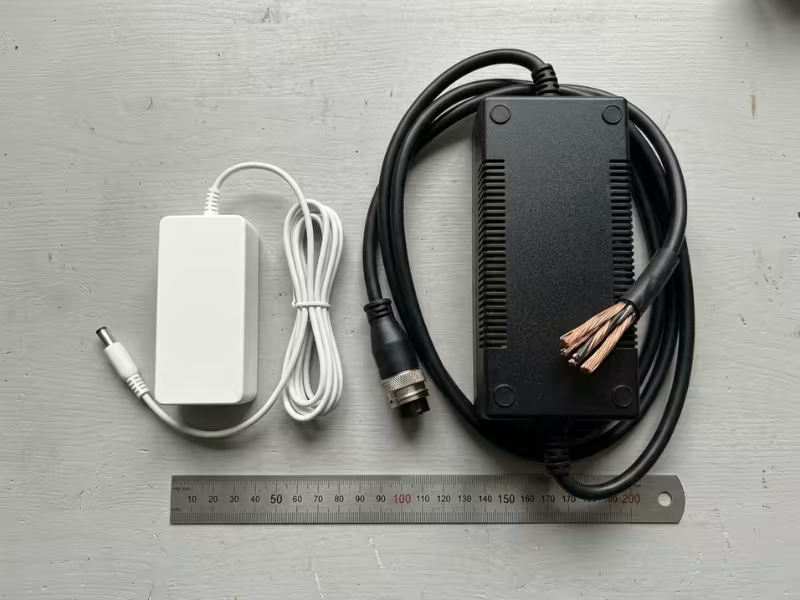
Above roughly 150 to 200 W, external adapters start working against you. The brick gets heavy, often 600 g or more, and it runs warm wherever the user drops it. The DC cable becomes a problem too.
Watch what happens to current as power climbs:
- 300 W at 24 V pulls 12.5 A through the DC cable.
- 300 W at 12 V pulls 25 A.
At those levels, you need thick conductors, a connector rated for the current, and careful voltage-drop math. A 1.8 m cable at 12.5 A can lose half a volt or more before power reaches your board. Every extra amp also adds heat at the connector, which is a common failure point.
An internal supply avoids all of that. The product takes one standard AC cord, usually through an IEC C14 inlet. Any facility can find a replacement cord in minutes. For fixed equipment, such as lab analyzers, industrial controllers, kiosks, and large printers, that one-cable setup simply works better.
It Gives You Control of the Whole System
Power level is only part of the case. The bigger benefit is control.
With one enclosure, you design one airflow path. The system fan that cools your processor can also cool the supply. You decide where hot parts sit, where air enters, and where it leaves. You can also tie the supply into the product’s logic. A power-fail signal, remote on/off, and controlled start-up sequencing all become simple board-level features instead of cable problems.
Product positioning matters here too. Buyers in labs, factories, and hospitals often expect a fused AC inlet and a power switch on the back panel. To them, an external brick looks like consumer gear.
I worked with a team that built a 180 W benchtop analyzer around a 24 V external adapter. Lab customers complained within months. Technicians taped the bricks under benches, borrowed them for other instruments, and once plugged in a 19 V laptop charger by mistake. The team moved the supply inside, added a fused inlet and switch, and shared the existing system fan. They also used the supply’s power-fail signal to save test data during outages. Power-related support calls dropped sharply after the next release.
It Raises the Cost of Being Wrong
That control comes with a price. Once the supply moves inside, every mistake stays inside with it.
Heat stays in your box. A 200 W supply at 92% efficiency turns about 17 W into heat inside the chassis. Your thermal budget has to carry that load on the hottest day, at full output, with dusty filters. If it can’t, the supply derates or the processor throttles.
The whole product carries the safety burden. Mains voltage now enters your enclosure. Your layout must hold mains-level creepage and clearance. Your enclosure may need to act as a fire enclosure. A Class I design needs a solid protective earth bond, and your production line needs hipot testing on every unit. A recognized component supply helps, but only if you follow every condition of acceptability in its test report.
Service gets harder and more expensive. A failed internal supply usually means a technician visit or a full unit return. You can soften this with good design:
- Mount the supply as a module, with connectors instead of soldered wires.
- Place it behind a panel a technician can open in minutes.
- Stock spare modules at service centers, not just full units.
- Choose a supplier with a long production lifecycle and clear change control.
Skip these steps, and a small power fault turns into freight, bench time, and an unhappy customer.
An internal supply isn’t the premium option by default. It’s the right option for products whose teams are ready to own all of that complexity inside the chassis. If your thermal budget, safety plan, and service model can carry it, internal power gives you a cleaner, more controlled product. If they can’t, the brick on the floor may be the smarter compromise.
The Five Trade-Offs That Usually Decide the Architecture
Most teams weigh every factor at once and end up arguing in circles. I rank them instead. I work through five trade-offs in a fixed order, because the early ones can rule out options before the later ones matter.
Start at the top. If a factor gives you a clear answer, the factors below it rarely overturn it.
1. Thermal Budget: Can the Box Carry the Extra Heat?
I check heat first because physics doesn’t negotiate. Take your enclosure’s allowed internal temperature rise. Then subtract what your processor, radios, and other hot parts already use. Whatever is left is the room you have for the supply’s losses.
Here is my quick rule. If the supply’s heat would use more than about a third of that remaining margin, lean external. A 60 W supply at 90% efficiency adds roughly 6.7 W. In a sealed, fanless case that already runs warm, that can consume most of your margin. In a fan-cooled 300 W chassis, the same 6.7 W barely registers.
If the product already has a fan, internal power gets much easier. If it can’t have one, external moves to the front.
2. Certification Strategy: Who Carries Mains Safety?
Next, ask how fast you need approval and how much safety work your team wants to own.
A pre-certified adapter with a Limited Power Source (LPS) output often lets your device stay a low-voltage product. Under IEC 62368-1, that can ease the rules for fire enclosures, spacing, and touch safety. I’ve seen teams cut weeks from their test plan this way.
An internal supply brings mains voltage inside. Your lab then checks the AC inlet, the earth bond, creepage around the supply, and the enclosure as a fire barrier. That’s manageable if your team has done it before. It’s risky on a first product or a tight launch date.
The external route has one catch. Your approval names a specific adapter. If you switch vendors later, you may need to update your safety file and retest.
3. Service and Warranty Model: Who Touches a Failed Unit?
Now picture the day a supply fails, and the person who has to deal with it.
If an end user handles it, external wins easily. They plug in a new adapter, and you ship a small part instead of taking back a full unit. If a field technician services the product on site, an internal module behind an access panel works just as well. This works best when service centers keep spare modules on hand.
Match the architecture to your longest warranty. On a three-year consumer warranty, a cheap replaceable adapter limits your exposure. On a ten-year industrial contract, a qualified internal module with long-term availability often costs less to support.
4. Global SKU and Plug Strategy: How Many Versions Will You Stock?
This factor can override an otherwise sound electrical choice.
An internal universal-input supply lets you ship one device and change only the AC cord for each region. Regional cords cost little, follow common standards, and you can source them locally. A fixed-plug adapter needs a separate version for each plug type. Interchangeable plug clips cut that down to one adapter body and a handful of clips.
Count SKUs before you decide. If you sell into more than three or four plug regions and can’t use clips, internal power often simplifies your warehouse more than it complicates your design.
5. User Experience and Brand Fit: What Does the Buyer Expect?
I put this last on purpose. It matters, but it should break ties, not overrule the first four factors.
Consumers accept a brick, and many now expect USB-C charging. Lab, factory, and hospital buyers often expect an IEC inlet and a power switch on the back panel. Look at what your buyer sees on similar products and match it. Don’t pay for internal power just because it looks premium in a render.
Here is how each trade-off usually leans:
Trade-Off | Leans External When… | Leans Internal When… |
|---|---|---|
Thermal budget | The case is sealed, fanless, or short on heat margin | A fan already cools the chassis |
Certification | You need a fast, low-voltage approval path | Your team already handles mains-level safety |
Service model | End users replace parts themselves | Technicians service units on site |
SKU strategy | You sell in one region or can use plug clips | You sell in many regions with standard AC cords |
Brand fit | Buyers use consumer or portable gear | Buyers use professional or fixed equipment |
Work down the list in order. The first factor that gives you a firm answer usually decides the architecture.
Cost Is Not Just BOM: Where Each Architecture Hides Expense
When sourcing compares quotes, the external adapter often looks like the expensive option. A 36 W adapter might add $6 to $9 to the BOM. An open-frame internal board with the same rating may cost $4 to $6. That gap is real, but it’s the smallest number in the whole cost picture.
I ask a different question instead. Who absorbs the complexity, and who pays when something goes wrong?
With an external adapter, you buy a finished product from a second vendor. You pay for its housing, DC cable, connector, and packaging. You also take on a separate supply contract with its own lead times, MOQ, and change-notice terms. Then the regional plugs arrive. A fixed-plug adapter sold in North America, Europe, the UK, and Australia means four part numbers. Each one needs its own forecast, safety stock, and box insert. I’ve watched a team sit on $40,000 of UK adapters because one distributor cut its order.
An internal supply hides its costs inside the chassis. The board costs less, but your product now needs an AC inlet, a fuse, line filtering, and often a metal shield or fire barrier. The supply also claims board space the layout team wanted for other parts. Assembly takes longer, with earth bonds and wire routing to check. Your line needs a hipot tester and a test on every unit. That adds seconds per unit and a few thousand dollars in equipment. Then comes the thermal work: extra vents, a bigger heatsink, and sometimes a fan nobody planned for.
Warranty math often flips the whole comparison. Say you ship 20,000 units, and 2% suffer a power failure over three years. That’s 400 failures. With an adapter, you mail 400 replacements at $10 to $15 each, plus postage. Call it about $8,000. With an internal supply, each failure usually means a full unit return. Once you count freight, bench time, and a loaner, that runs $80 to $150 or more per unit. Your total lands between $32,000 and $60,000, and that’s before you count the customer who waited two weeks.
Shipping adds its own drag. A 90 W brick weighs 300 to 400 g and takes up space in every carton. Across a pallet, that can mean fewer units per shipment and higher freight per unit. Multiple plug SKUs also mean multiple packaging variants, and each carton print run carries its own setup cost.
The biggest number comes from choosing wrong. Switching architectures after launch means new enclosure tooling, often $15,000 to $50,000, plus another round of safety and EMC testing. It may also mean replacing units already in the field. One team I advised spent more on that switch than it had saved on power parts in the product’s first two years.
So don’t ask which option is cheaper. Ask where you want the complexity to live, and whether your team, your supply chain, and your service network can carry it there.
A Practical Decision Framework for OEM Teams
The five trade-offs tell you what to weigh. This framework tells you what your answers usually mean. I use it in early design reviews, when the team has a product profile but no enclosure yet.
Read each scenario and ask yourself whether it sounds like your product. If two or more fit, you likely have your answer.
External Usually Wins When…
Your product sits on a desk, a shelf, or in a bag. Think of a 24 W network gateway, a 40 W label printer, or a portable patient monitor. Users plug these products in themselves. Nobody installs them.
The case is sealed or fanless and already runs warm. Your thermal model may show less than 10°C of margin before you add the supply. In that case, moving 5 W of loss into a brick buys that margin back.
Your launch date is tight, and your team has never handled mains-level safety. A pre-certified LPS adapter keeps your device on the low-voltage path. That usually shortens the lab schedule.
End users handle their own returns. Your support plan may say “ship a replacement part.” If so, a $12 adapter in an envelope beats a full unit return every time.
If your product draws under about 65 W and matches two of these scenarios, I rarely see a good reason to go internal.
Internal Usually Wins When…
Someone installs the product once and leaves it there. This covers DIN-rail controllers, lab analyzers, self-service kiosks, and large printers. A brick has no safe place to live in these setups. Vibration or cleaning crews knock it loose.
The chassis already has a fan, or needs one anyway. The supply can share that airflow. Its 15 to 20 W of loss becomes a sizing detail, not a crisis.
You sell into many plug regions and can’t use interchangeable clips. One universal-input design with local AC cords beats stocking five adapter versions.
Technicians service units on site over a 10-year life. A modular internal supply behind an access panel fits this model well, with spares stocked at service centers. It holds up better than an adapter model that may reach end of life in three years.
The draw passes 150 to 200 W. At 12 V, that means about 13 to 17 A through a DC cable. Internal power removes that problem entirely.
The Hybrid Path Worth Considering
Some products don’t fit neatly in either column. For those, I often suggest a middle route. An external adapter supplies one DC voltage, usually 12 V, 19 V, or 24 V. Small DC-DC converters on your board then create every rail you need.
This approach works well when:
- Your board needs several low-voltage rails, such as 5 V, 3.3 V, and 1.2 V
- Your processor, sensors, or radios need tight regulation, often within ±2%
- You have room for a few buck converters on the board
- You want heat and mains safety outside the box, but full control of the rails inside
You keep the thermal and certification benefits of the brick. You also get clean power right at each chip, because local converters absorb ripple and small input swings.
The hybrid path still needs care in three places:
- Adapter quality. A cheap adapter can sag during load steps. Your converters can’t fix an input that drops below their minimum. Specify ripple and load-step response, not just wattage.
- Cable sizing. Calculate voltage drop at peak current. A 0.8 V loss means little on a 24 V input. On a 12 V input, the same loss can trip undervoltage lockout.
- Connector reliability. Choose a locking or keyed connector rated well above peak current. A worn barrel jack causes intermittent resets that look like firmware bugs.
If your product lands in the gray zone, the hybrid path often settles the debate. It lets the brick handle what it does best, and lets your board handle the rest.
Where Teams Usually Misjudge the Choice
Most wrong calls I review don’t come from bad engineering. They come from a rule of thumb that worked on the last product and quietly failed on this one. These five come up on project after project.
“It’s only 30 W, so it has to be external.” Low wattage points toward a brick, but it doesn’t settle the question. One team put a 30 W sensor hub for a food plant on an external adapter. Within a year, washdown crews had sprayed the adapters so often that the DC jacks corroded. An internal supply in a sealed IP65 housing would have survived. Look at the environment and who installs the product before you let wattage choose for you.
“Internal will make it feel premium.” Buyers judge quality by the whole experience, not by where the supply sits. A consumer speaker with an internal supply may need vents, a thicker shell, and a heavier carton, and the customer still sees only one cord. Meanwhile, most consumers now see a slim USB-C adapter as modern. Check what your buyers see on competing products. Pay for internal power when it solves a real problem, not when it only looks good in a render.
“We’ll sort out plugs later.” Plug types feel like a packaging detail until sales opens a new market. A fixed-plug adapter certified for the US can’t become a UK part with new prongs. It needs its own housing, its own approvals, and its own part number. If your roadmap includes more than two plug regions, choose now between interchangeable clips and an internal universal-input design.
“It’s 90% efficient, so the heat is small.” Ten percent sounds minor until you convert it to watts. A 120 W internal supply at 90% efficiency adds about 13 W inside the case. In a fanless enclosure, that can raise internal air by 8 to 10°C. That’s enough to cut the expected life of nearby electrolytic capacitors roughly in half. Run your thermal model with the supply’s real losses at worst-case ambient before you commit.
“The internal board is $3 cheaper, so internal wins.” Saving $3 across 10,000 units looks like $30,000. Then add the AC inlet, fuse, line filter, hipot station, and extra assembly time. Add every warranty failure that now comes back as a full unit return instead of a $12 adapter in an envelope. Build a three-year cost model that includes service, and only then let the numbers decide.
Each of these mistakes starts with one factor taken out of context. Weigh all five trade-offs together, and the wrong answer rarely makes it through design review.
FAQs About External Adapters vs. Internal Power Supplies
OEM teams ask me these six questions in almost every power architecture review.
What wattage threshold makes an internal power supply the better choice?
No hard line exists, but power level gives you a direction. Under about 65 W, external adapters usually win. Between 65 W and 150 W, your thermal budget and service model decide. Above about 150 to 200 W, internal supplies usually make more sense. At that level, the brick gets heavy and the DC cable carries high current. At 12 V, a 200 W load pulls almost 17 A. Size against your real peak, not your average draw.
Can I ship one product SKU worldwide with an external adapter strategy?
Yes, if you plan for it early. Choose an adapter body with universal 100–240 VAC input and interchangeable plug clips. You then stock one device SKU, one adapter, and a small set of regional clips. Fixed-plug adapters break this model, because each plug type needs its own housing, approvals, and part number. Before you commit, confirm the adapter carries the marks each market requires, such as UL, CE, UKCA, PSE, and CCC.
Does using a pre-certified external adapter reduce my product’s safety testing?
Usually, yes. If the adapter has a certified Limited Power Source output, your device often stays on the low-voltage path under IEC 62368-1. That can ease the requirements for fire enclosures, spacing, and touch safety. It doesn’t remove testing, though. Your lab still checks temperatures, markings, and fault conditions on the device. EMC applies to the full system with the real adapter attached. Your safety file must also name the exact adapter model you ship.
How do USB-C PD adapters change the external versus internal decision?
They push many products toward external power, especially as more OEM devices move toward standardized USB PD charging solutions. Standard PD covers up to 100 W. Extended Power Range reaches 240 W, so laptops, monitors, and docks can now share one adapter type. In the EU, the common charger rules require USB-C charging on many consumer devices, and they let buyers choose to purchase without a charger. The trade-off is control. Users will plug in any USB-C charger, so design your device to handle weak or noncompliant sources safely.
Which option costs less over a five-year warranty period?
For products that end users return themselves, external usually costs less. Take 20,000 units with a 3% power failure rate over five years. That gives you 600 failures. Replacement adapters, including postage, cost about $12,000. Full unit returns at $80 to $150 each run $48,000 to $90,000. Internal power can win when technicians swap a modular supply on site. It also helps when the adapter model might reach end of life before the warranty ends.
What happens to my certification if I swap adapter vendors mid-production?
Your approval names a specific adapter, so a swap reopens your safety file. At a minimum, add the new model to the file and send its CB report to your lab. Expect the lab to review the change. Plan to rerun EMC, because a new adapter changes both conducted and radiated emissions. Medical and other tightly regulated products face a deeper review. Qualify a second adapter during development, so you can switch later without stopping production.

Decide Where the Complexity Lives
The fanless gateway from earlier didn’t fail because of a bad supply. It failed because the team put 5 W of extra heat into a box that had no room for it.
That’s the real choice here. An external adapter moves heat, service, and part of the compliance work outside the chassis. An internal supply keeps control inside, along with all the complexity that comes with it. Neither option is cheaper or more premium by default. This is a complexity placement decision.
So before you freeze the enclosure, score your product from 1 (leans external) to 5 (leans internal) on each factor:
- Thermal budget: How much heat margin is left?
- Certification strategy: Who should carry mains safety?
- Service model: Who replaces a failed unit?
- SKU plan: How many plug regions will you ship to?
- Wattage: What is the real peak load, not the average?
Let the total drive the architecture, not the team’s preference. An afternoon of scoring now costs far less than new tooling later.