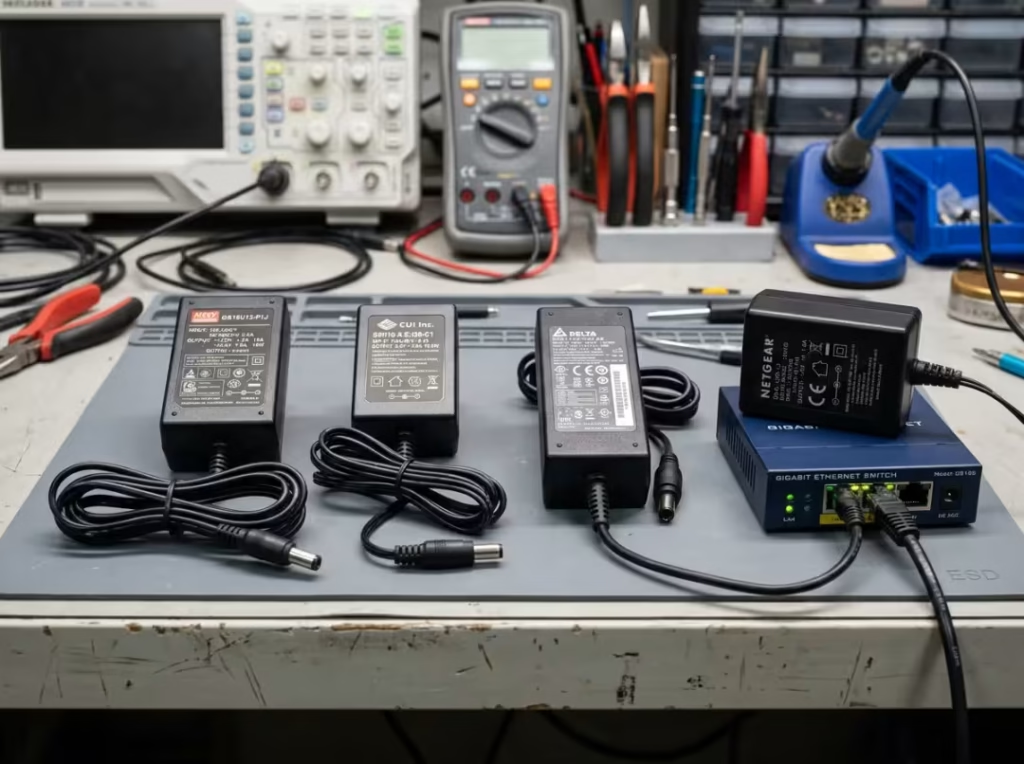
Plug the wrong adapter into a device, and you’ll see one of three things: nothing happens, the unit resets every time it loads up, or a board slowly cooks itself over a few weeks until it dies. Almost every one of those failures traces back to a mismatch in five specs — voltage, current capacity, wattage headroom, connector and polarity, or safety certification.
Get those five right, in the right order, and you catch most bad decisions before they cost you anything. This guide walks through that order. By the end, you’ll be able to look at a device label, look at an adapter label, and know within a minute whether they belong together.
The short logic: voltage has to match exactly, current is a floor and not a ceiling, and a connector that physically fits proves nothing on its own.
What Is an External Power Adapter?
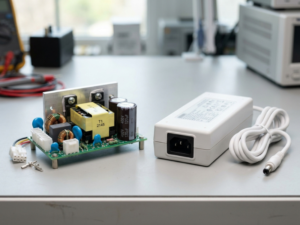
An external power adapter is an AC-DC converter that lives outside the product it powers. It takes wall AC and turns it into the regulated DC voltage the device expects. You’ll hear it called an AC adapter, power brick, wall wart, or line adapter — same hardware, different names.
Engineers put the converter outside the enclosure for practical reasons. The product runs smaller and cooler because the heat-generating conversion stage sits in the brick, not the device. Certification gets simpler, since the adapter carries its own approvals. And when it fails, a user swaps it in seconds instead of shipping the whole unit back for service.
If you want the deeper background on how that conversion actually works, our guide to switching power supplies (SMPS) covers the topology behind most modern adapters. For the purposes of choosing one, the concept is simple. The work is in matching it correctly.
What to Gather Before You Choose
Before you shop, pull four numbers off the device you’re powering:
- Required DC voltage (for example, 12 V)
- Current draw (for example, 2 A)
- Connector type and barrel size
- Polarity (center-positive or center-negative)
You’ll find these on the device label, printed on the original adapter, or buried in the datasheet. If none of those survive, the manufacturer’s spec sheet is your fallback.
One habit destroys more devices than anything else on this list: assuming two adapters are interchangeable because the plug snaps in. A matching barrel tells you nothing about voltage, current, or polarity. Gather the four numbers first, then match against them.
How to Choose the Right External Power Adapter: Step by Step
This is the part that matters. Work through these six steps in order, because the sequence protects you. A voltage mistake ends the process on the spot — there’s no point checking the connector on an adapter that will fry the board. The later steps only refine a choice that’s already safe.
Step 1 — Match the DC Output Voltage Exactly
The adapter’s DC output has to match what the device expects. A 12 V device needs a 12 V adapter. No rounding, no “close enough,” no splitting the difference.
Go too high, and you push the device past its rated input. Regulators overheat, capacitors bulge, and in the worst case the load itself dies. Go too low and the device browns out — it fails to boot, resets under load, or behaves so erratically that you’ll waste an afternoon chasing a fault that isn’t there. I’ve watched people replace mainboards over what turned out to be an 11 V adapter on a 12 V device.
Most external adapters output somewhere between 3.3 V and 56 V DC. Some carry two or three separate rails, each with its own rating, so make sure you’re reading the one that feeds your device.
Step 2 — Choose the Right Current (Amperage) Rating
This is the spec people misread most often. An adapter’s current rating is the maximum it can supply, not a fixed amount it forces into the device. The device pulls only what it needs and ignores the rest.
So the rule is simple: the adapter’s current rating must be at least as high as the device’s current draw. A device that draws 2 A runs perfectly on a 12 V / 2 A adapter and just as well on a 12 V / 3 A one. Extra current headroom sits there unused.
Going under is where things break. Undersize the adapter and it runs hot, its output sags under load, and it ages fast — often failing months later in a way that looks like a device fault rather than an adapter that was always too small. When in doubt, size up on current.
Step 3 — Confirm Total Wattage and Headroom
Wattage ties voltage and current together:
Watts = Volts × Amps
A 12 V device drawing 3 A needs 12 × 3 = 36 W, so the adapter has to be rated for at least that. But sizing to the exact number is a mistake. Startup surge, continuous-load heating, and long-term margin all eat into that figure.
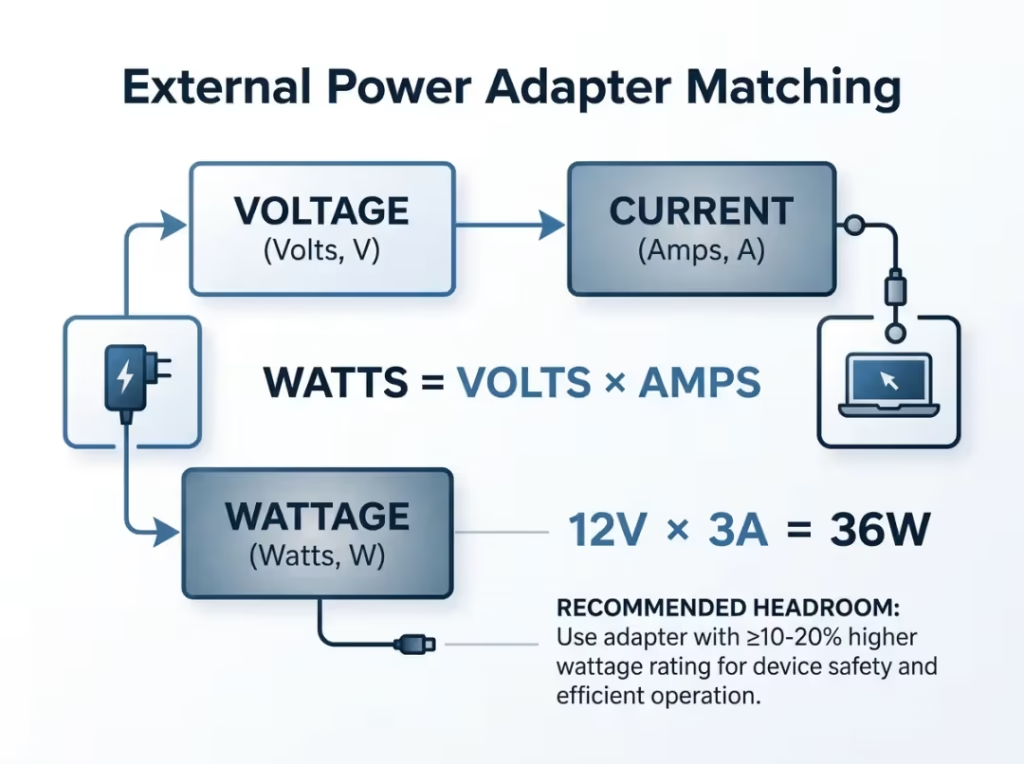
Build in roughly 20–30% headroom. For the 36 W example, that points you to a 45–50 W adapter. Then check the datasheet’s over-temperature derating curve — an adapter rated for full power at room temperature often delivers noticeably less above 40–50 °C. That gap matters the moment you drop it into a warm enclosure or a sealed cabinet, which is exactly where undersized supplies quietly fail.
Step 4 — Verify Connector Type, Barrel Size, and Polarity
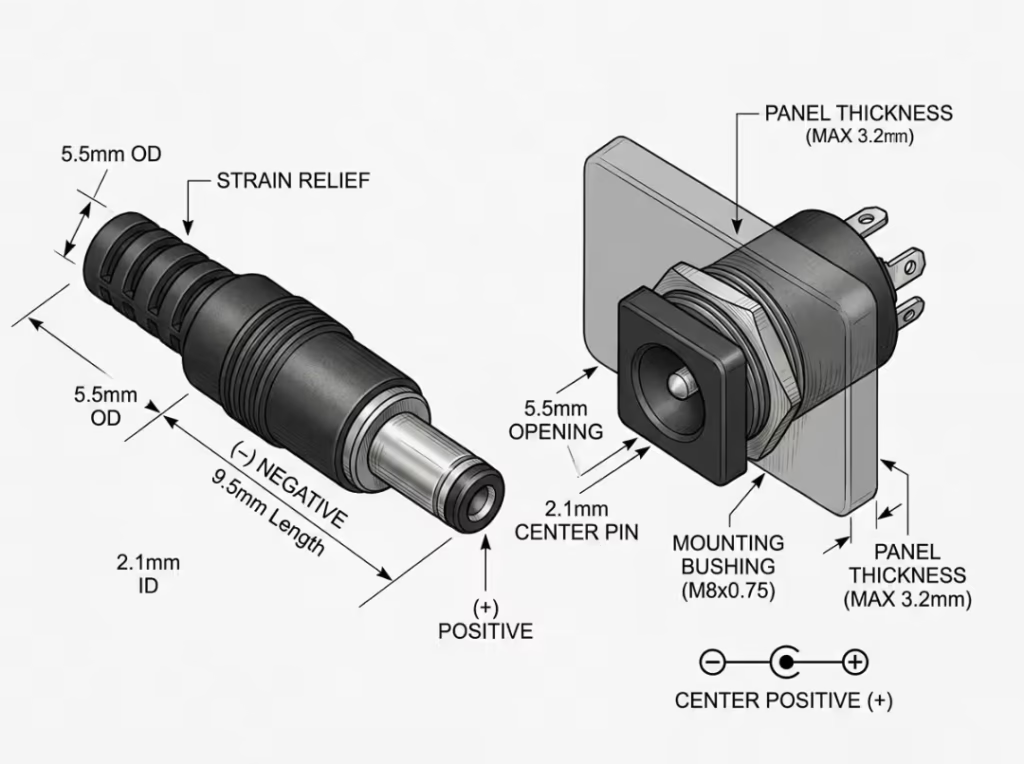
Barrel connectors come down to four dimensions: inner diameter, outer diameter, barrel length, and polarity. All four have to match the device jack. A plug that goes in loose, or one you have to force, is the wrong size no matter how close it looks — and either way you get intermittent contact, arcing, or a connection that drops out under vibration.
Polarity is where devices die instantly. Center-positive means the center pin carries the positive voltage; center-negative reverses it. A plug can fit perfectly and still be wired backward. Reversed polarity on an unprotected board can destroy it the moment you connect power, so confirm the polarity symbol on both the adapter and the device before anything goes live.
Barrels aren’t your only option, either. You’ll also meet multi-pin DIN connectors, Molex-style pin-and-socket receptacles, and USB-C PD on newer gear. Each has its own matching rules, but the principle holds everywhere: physical fit is necessary, never sufficient.
Step 5 — Check the AC Input Voltage Range
Most modern adapters accept a universal input of 90–264 VAC. That single range covers nearly every country, so you swap only the AC cord or wall plug for the region — the adapter itself travels anywhere.
If yours isn’t universal, match it to the local supply: 110–120 VAC across North America and 220–240 VAC in much of Europe and Asia. Feed a region-specific adapter the wrong mains voltage and you either get nothing or you get smoke.
A few applications sit outside the norm. Portable medical gear sometimes needs input down to 85 VAC to ride out weak supplies, and some lighting or industrial equipment runs on higher ranges that call for a different class of converter entirely.
Step 6 — Confirm Efficiency and Safety Certifications
Efficiency. In the U.S., the Department of Energy requires Level VI efficiency for most external adapters sold today, and the EU enforces an equivalent standard. Compliant units usually carry a Roman numeral VI inside a circle. Older Level IV and V designs are no longer approved for new products. A few categories, such as certain FDA-regulated medical devices, are exempt — check what applies rather than assuming.
Safety. Certification depends entirely on where the adapter operates. Commercial and industrial adapters follow standards like IEC 62368-1. Medical adapters meet far stricter leakage and isolation limits under IEC 60601, because a fault near a patient has consequences a desktop supply never will. Region-specific marks stack on top of all that. A matching connector means nothing if the certification doesn’t fit the application.
Skip any single step and you inherit a specific, predictable failure: wrong voltage kills the device, low current cooks the adapter, no headroom shortens its life, reversed polarity fries the board, wrong input means it won’t run abroad, and missing certification blocks the product from market — or worse, passes an unsafe unit into service.
Three Real Selection Scenarios
The six steps are the framework. Here’s how they play out when there’s an actual device in front of you.
Replacing a Lost Router Adapter
A home router’s brick goes missing. The router label reads 12 V / 1.5 A, center-positive, 5.5 × 2.1 mm barrel. You match 12 V exactly, pick a current rating of 1.5 A or higher — a 12 V / 2 A unit is fine — confirm center-positive, and check the barrel dimensions against the jack. Universal input and a basic commercial safety mark finish the job. Five minutes, no guesswork.
Powering an Industrial Control Box
Now the load lives in a sealed cabinet that sits at 55 °C on a warm day. Same six steps, but Step 3 does the heavy lifting: you don’t just cover the running wattage; you account for the derating curve and add real headroom so the adapter holds full output at temperature. This is also where surge and lightning protection start to matter, especially with long cable runs or outdoor sensors feeding in — our industrial PoE adapter with surge and lightning protection is built for exactly that environment.

Specifying an Adapter for a Medical Device
Here the electrical match is only half the decision. A patient-contact device needs an adapter certified to IEC 60601, with tighter leakage current and isolation than any commercial part provides. A generic 12 V brick with the correct barrel can still be the wrong choice, because the certification — not the voltage — is what keeps it compliant and safe. If you’re specifying for this space, our guide to AC-DC power supplies for medical applications walks through the standards in detail.

Wall-Mount vs. Desktop External Power Adapter
Form factor isn’t cosmetic. It affects how much power the adapter can deliver, how much strain it puts on the outlet, and how easily you deploy it across regions.
Factor | Wall-Mount | Desktop |
|---|---|---|
Typical power range | Lower (up to ~30–40 W) | Higher (40 W and up) |
Plug flexibility | Fixed blades or interchangeable clips | Detachable IEC cord, easy region swap |
Outlet strain | Higher (weight hangs on the socket) | Lower (sits on a surface) |
Best for | Light, portable devices | Higher-power or fixed installations |
Choose wall-mount for low-power, portable, single-region devices where you want minimal cabling and a self-contained plug — routers, small sensors, consumer accessories.
Choose desktop when the load is heavier, the wattage is higher, or you’re shipping to multiple markets. The detachable IEC cord lets you change the plug for different regions without touching the adapter, and the weight rests on a surface rather than hanging from the wall socket.
How to Choose a Replacement External Power Adapter
Replacing a dead or lost adapter is the single most common reason people go looking, and it’s short work if you start from the original.
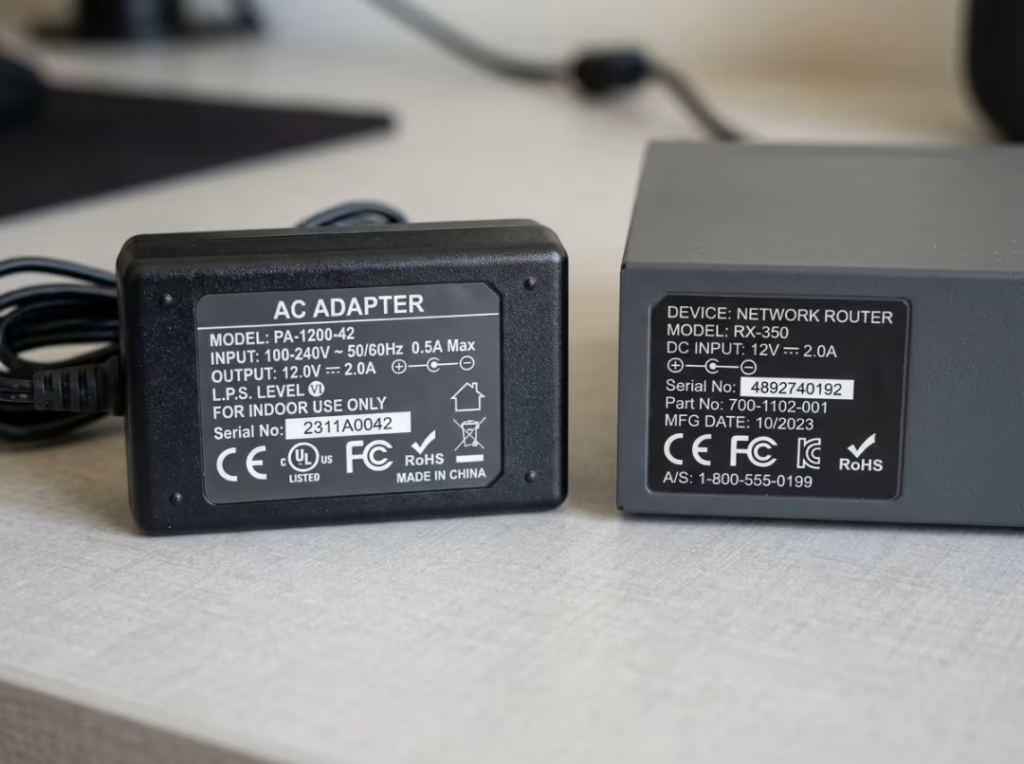
Read the original’s label. Find the output voltage, current rating, and polarity symbol on the old adapter or on the device. Those three values anchor everything.
Match voltage exactly, current equal or higher. An original 12 V / 2 A unit can be replaced with a 12 V / 3 A unit without a second thought. The reverse — dropping to 1 A — is what gets people into trouble.
Verify polarity and connector dimensions. Confirm center-positive versus center-negative, then check the barrel’s inner diameter, outer diameter, and length against the jack. This is the step rushed replacements get wrong.
Confirm certification for the environment. A replacement in a medical or industrial setting must carry the appropriate approval, not just a matching plug. Don’t drop a generic commercial brick into equipment that requires medical-grade isolation.
How to Read an External Power Adapter Label
The label tells you everything you need to check compatibility. Read it top to bottom against your four gathered numbers.
Label line | Example | What it means |
|---|---|---|
Input | 100–240 V ~ 50/60 Hz | Universal AC input; works on most regional supplies |
Output | 12 V ⎓ 2 A | DC output voltage and the maximum current it delivers |
Polarity symbol | ⊕–⊙–⊖ diagram | Shows center-positive or center-negative |
Efficiency mark | VI (in a circle) | Meets DoE Level VI efficiency |
Safety marks | Regional / application certs | Confirms approval for the region and use case |
If input, output, polarity, and connector all line up — and the certifications suit the environment — you have a match.
Common Mistakes When Choosing an Adapter
These are the errors that show up again and again in the field:
- Matching current but not voltage. The plug fits, the amps look right, but the voltage is off — and the device pays for it.
- Reversing polarity because the plug fits. A backward center pin can kill an unprotected device on contact.
- Choosing a barrel that fits the hole but has the wrong diameter. A loose or forced fit means intermittent contact and failures under vibration.
- Undersizing wattage and ignoring inrush. An adapter sized to the exact running load has nothing left for startup surge.
- Assuming all 12 V adapters are interchangeable. Same voltage, wildly different current ratings, connectors, and polarities.
- Forgetting over-temperature derating. An adapter rated for full power on a bench delivers less inside a warm, sealed cabinet.
- Overlooking medical or industrial certification. The right electrical specs don’t help if the approval doesn’t match the environment.
When You Need a Custom Adapter
Off-the-shelf covers most needs. But some designs push past the catalog, and it’s worth knowing when you’ve hit that point:
- A non-standard output voltage no stock model provides.
- A specialized connector outside the common barrel and DIN families.
- An unusual certification stack — a device that has to satisfy medical and industrial requirements at once.
- A tight thermal or mechanical envelope where stock dimensions or derating won’t fit.
- Multiple output rails from a single adapter.
This is a genuine build-versus-buy call, not an automatic upgrade. If a stock adapter meets voltage, current, connector, thermal, and certification requirements, use it. Custom earns its cost only when one of those boxes can’t be checked any other way.
Frequently Asked Questions
Can I use an adapter with a higher current rating than my device needs?
Yes. The device draws only the current it needs; the rating is the maximum the adapter can supply. A 12 V / 2 A device runs fine on a 12 V / 3 A adapter. Higher is safe. Lower overheats and fails.
What happens if the adapter voltage is too high or too low?
Too high can damage regulators, capacitors, or the load itself. Too low causes brownouts, failed boots, and erratic faults that mimic other problems. Voltage has to match the device requirement exactly.
How do I know if my adapter is center-positive or center-negative?
Check the polarity symbol on both the adapter and the device labels. A plug that fits does not confirm correct polarity, and reversing it can destroy an unprotected device.
How much wattage headroom should an adapter have?
Aim for about 20–30% above the device’s continuous draw to cover startup surge and temperature derating. A 36 W load points to a 45–50 W adapter. Confirm against the datasheet’s derating curve for the temperature you’ll actually run at.
Is it safe to use an adapter from a different device if the voltage matches?
Only if voltage, current capacity, connector size, and polarity all match — and the certification suits the environment. Matching voltage alone is not enough.
What’s the difference between medical and industrial adapter certifications?
Medical adapters meet stricter leakage and isolation limits per standards such as IEC 60601 to ensure patient-contact safety. Industrial and commercial adapters follow standards such as IEC 62368-1. A medical setting needs a medical-certified adapter, not just an electrically matching one.
Key Takeaways
Choosing the right external power adapter is a matter of matching five specs in order: exact voltage, current at or above the device’s draw, wattage with 20–30% headroom, the exact connector and polarity, and a certification that fits the environment. Get the sequence right and the wrong adapter never makes it into service.
When you’re ready to specify, start from the device label, work down the six steps, and treat any physical fit as a starting point rather than proof. For anything in a harsh, outdoor, or medical setting, let the certification and thermal requirements lead the decision — that’s where a generic part most often turns out to be the wrong one.