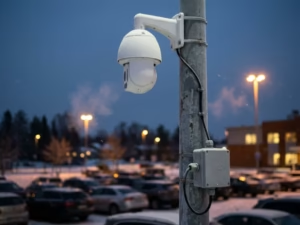
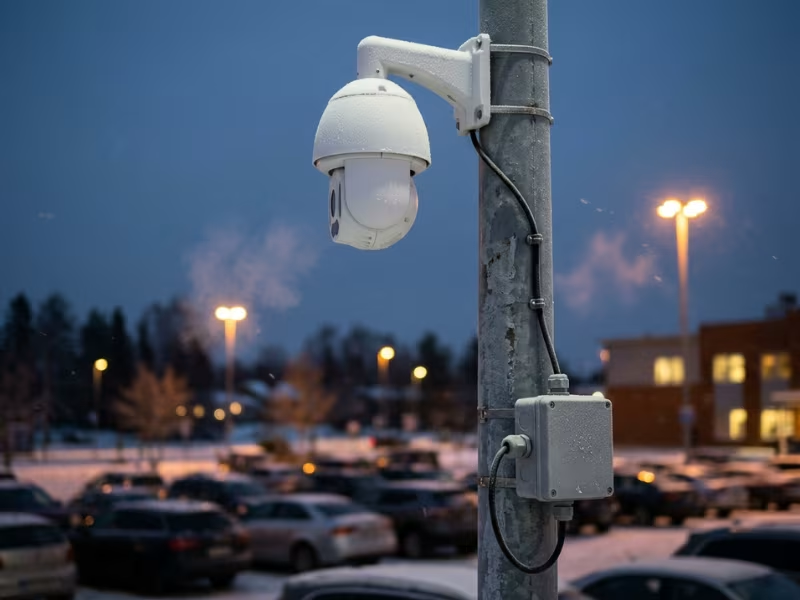
A PTZ camera on a parking lot pole works fine all summer. Then the first cold night arrives. The heater kicks in, the motors pan, and the camera reboots every few minutes.
The injector says 90W. The camera still drops power.
High-power PoE takes more than buying a 90W injector.
I help installers and IT teams plan 802.3bt deployments every week. This guide shows what 802.3bt really delivers, how to pick the right adapter type, and how to budget power and check compatibility before you buy.
What 802.3bt Really Adds Over Older PoE Standards
Most PoE confusion starts with the numbers on the box. Every standard lists two wattage figures, and buyers often read the wrong one. Once you know which number matters, choosing the right gear gets much easier.
Three Standards, Side by Side
The IEEE has released three main PoE standards, and each one raised the power ceiling.
802.3af (Type 1) came first. 802.3at (Type 2), often called PoE+, roughly doubled the power. 802.3bt, ratified in 2018, added Type 3 and Type 4.
Vendors also sell 802.3bt as PoE++, 4PPoE, or 4-pair PoE. All four names describe the same standard.
| Standard | 802.3af | 802.3at (PoE+) | 802.3bt (PoE++) | 802.3bt (PoE++) |
| Type | Type 1 | Type 2 | Type 3 | Type 4 |
| Source power | 15.4W | 30W | 60W | 90W |
| Power at device | 12.95W | 25.5W | 51W | 71.3W |
| Typical devices | VoIP phones, fixed cameras, basic APs | Wi-Fi 5/6 APs, small PTZ cameras, video phones | Wi-Fi 6E/7 APs, multi-radio APs, PTZ cameras | Displays, thin clients, PTZ cameras with heaters |
Read the “power at device” column first. That number decides whether your device actually runs.
Four Pairs Instead of Two
An Ethernet cable holds four twisted pairs. Older PoE sends power over only two of them. 802.3bt uses all four, so it delivers more power without overloading any single wire.
Type 3 sends about 600 mA per pair. That matches PoE+ per pair, but Type 3 uses twice as many pairs. Type 4 raises the current to about 960 mA per pair. More current means more heat in the cable, so Type 4 demands more from your cabling.
Before any power flows, the injector and the device run a short handshake. The device announces its power class. 802.3bt adds Classes 5 through 8. Many bt devices can also fine-tune their request later through LLDP.
| Class | Class 5 (Type 3) | Class 6 (Type 3) | Class 7 (Type 4) | Class 8 (Type 4) |
| PSE power | 45W | 60W | 75W | 90W |
| PD power | 40W | 51W | 62W | 71.3W |
Why 90W at the Source Isn’t 90W at the Device
The source (PSE) figure shows what the injector or switch sends out. The device (PD) figure shows what the standard guarantees will arrive.
Cable loss creates the gap. Copper has resistance, so every meter turns a little power into heat. The standard plans for the worst case, which is a full 100-meter channel. On a Type 4 link, it sets aside up to 18.7W for that loss. That’s why a “90W injector” guarantees only 71.3W at the device.
A shorter run loses less power. But don’t count on that extra margin in your plan. Size every device against the PD figure.
When I read a datasheet, I skip the source number. I look for the device’s class and its maximum draw. If a PTZ camera needs 65W with its heater on, Class 7 won’t cover it. It needs Class 8 and a Type 4 injector.
Which 802.3bt Adapter Type Fits Your Install
Choose the adapter type before you compare brands. Four options cover almost every job I see: single-port injectors, multi-port midspans, splitters, and bt-capable switches.
Each one works well in a specific situation and causes trouble outside it.
Single-Port Injectors for One or Two Devices
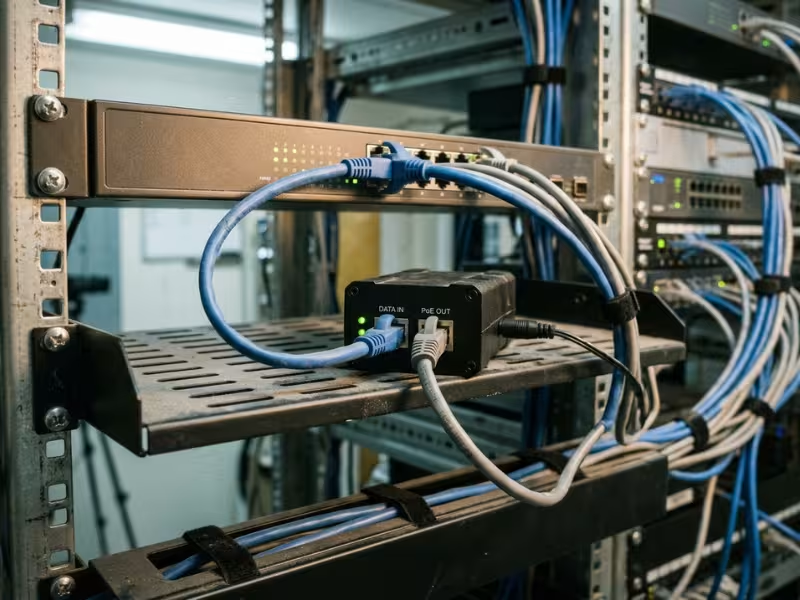
An injector sits between your existing switch and the device. Data passes through, and the injector adds power. You don’t touch the switch.
I use an injector when a site needs only one or two high-power devices. Common examples include a Wi-Fi 7 AP in a conference room, a PTZ camera added to an older network, or a display at a temporary event.
Check three things before you buy a PoE adapter for this job:
- Type support: A Class 7 or Class 8 device needs a Type 4 injector.
- Data speed: A 100 Mbps injector will bottleneck a Wi-Fi 7 AP. Look for Gigabit or multi-gig passthrough.
- Input range: This matters on sites with unstable mains.
Past three or four injectors, the setup gets messy. Each one adds a power brick, an outlet, and another possible failure point.
Multi-Port Midspans for Clustered Upgrades
A midspan works like several injectors in one chassis. It fits a group of devices in one zone, such as a classroom wing, a retail floor, or a camera cluster, behind a switch you want to keep.
Read two numbers on the datasheet: the per-port limit and the total budget. An 8-port unit might offer 90W per port but only 480W in total. Six Class 8 cameras already need 540W. The last ports either won’t power up, or the midspan will shut down low-priority ports.
The total budget matters more than the port count.
Splitters for Devices Without a PoE Input
A splitter sits at the device end. It takes PoE in and outputs DC through a separate plug, usually at 5V, 12V, 24V, or 48V. Use one for media players, access panels, or displays that only accept a barrel jack.
Match the voltage exactly. Then check the current.
A splitter fed 71.3W loses roughly 10% in conversion, so expect about 60W out. At 12V, that comes to 5A, and many barrel plugs and thin DC leads can’t carry that safely. At bt power levels, the splitter’s rating often sets the real limit, not the injector.
If the device comes in a version with a native PoE input, choose that version instead.
When a bt Switch Beats a Pile of Adapters
Adapters suit small numbers of devices. Once a closet holds about five or six high-power devices, a bt-capable switch usually costs less per port. It also adds per-port power monitoring, remote reboot, and a single UPS feed instead of a row of bricks.
Choose a switch if you need management, plan to add devices, or have few outlets. Keep adapters if your current switch is new, your budget is tight, or only one or two devices need bt power.
| Option | Single-port injector | Multi-port midspan | Splitter | bt-capable switch |
| Best for | 1–2 devices, retrofits, temporary installs | Device clusters behind an existing switch | Devices with DC input only | 5+ high-power devices, managed networks |
| Main advantage | Fast, low cost, no switch change | Several bt ports in one box | Powers non-PoE gear over one cable | Monitoring, remote reboot, clean closet |
| Main limit | Clutter and failure points at scale | Total budget often runs out before ports do | Voltage and current limits at the plug | Higher upfront cost |
Start with how many bt devices you need to power and where they sit. That answer usually points to one row in this table.
Power Budgeting: The Step That Decides Whether the Device Really Works
Most failed 802.3bt installs I troubleshoot have good hardware. The power plan behind it is what breaks. The device powers on and passes data, and then it drops off the network the first time it works hard.
A solid budget takes four checks. Skip any one of them, and the numbers on paper won’t match what happens on site.
Plan for the Worst Hour, Not the Average One
Datasheets often list a typical draw first. Ignore it. Find the maximum draw, usually in the fine print or the installation guide.
The gap can be large. A Wi-Fi 7 AP might idle at 22W and climb past 38W with all radios and a USB accessory active. A PTZ camera might run at 25W in summer. On a cold night, its heater, IR lights, and pan motors can push it to 65W.
Budget for that peak. A device that works only on mild days isn’t a working install.
Size the Port From the Device Side
Your device’s maximum draw tells you which class it needs. Then add 15% to 20% headroom for startup surges and component aging.
Here’s how I size a camera with a 60W peak:
- 60W × 1.15 = 69W needed at the device
- Class 7 delivers 62W, which falls short
- Class 8 delivers 71.3W, which covers it
That device now needs a Type 4 port. The port must reserve 90W at the source, because the standard holds back up to 18.7W for cable loss on a full 100-meter run.
Long runs and poor cable make this worse. Copper-clad aluminum (CCA) cable loses more power than solid copper and often fails at Type 4 currents. If a run comes close to 100 meters, I treat headroom as required, not optional.
Add the Ports Up Against the Total Budget
On a midspan or switch, every port competes for one shared power supply. The per-port rating tells you what one port can deliver. The total budget tells you what all of them can deliver at once.
Take a parking structure with one 8-port midspan rated 480W in total:
- 2 PTZ cameras with heaters at Class 8: 2 × 90W = 180W
- 3 Wi-Fi 7 APs at Class 6: 3 × 60W = 180W
- 1 entrance display at Class 8: 90W
That totals 450W at the source, or 94% of the budget. If you add one more AP, the plan runs over.
Now look at the typical-draw math for the same devices: about 156W. On that basis, a 240W midspan looks fine. In practice, it would start shutting down cameras on the first cold night.
| Device | Max draw | Cable/run concern | Recommended power plan |
| Wi-Fi 7 access point | About 35–40W | Bundled ceiling runs warm the cable | Class 6, Type 3 port, 60W reserved |
| PTZ camera with heater | About 60–65W in cold weather | Long outdoor runs near 100 m | Class 8, Type 4 port, 90W reserved |
| Ceiling-mounted display | About 50–55W at full brightness | Hot ceiling spaces cut cable margin | Class 8, Type 4 port, 90W reserved |
| Thin client with peripherals | Up to about 42W | Short desk runs, USB loads add up | Class 6, Type 3 port, 60W reserved |
Leave Room for What You’ll Add Next Year
Most networks grow. I try to keep any multi-port unit below 80% of its total budget on day one. That gap absorbs the next AP or camera without a new purchase.
Some managed gear uses LLDP to allocate power closer to the device’s real draw instead of the full class figure. That can free up budget, but only if every device supports it.
Plan with class-based numbers first. Treat any LLDP savings as extra margin, not part of the base plan.
Cable Quality and Distance Matter More at 60W–90W
At PoE+ levels, a so-so cable usually gets away with it. At Type 4 levels, it doesn’t. The same run that carried 30W for years can turn into the weak link once you push 90W through it.
Three things decide whether your cable can keep up: distance, conductor quality, and the heat around the run.
The 100-Meter Limit Still Applies
802.3bt didn’t extend the reach of Ethernet. The channel limit stays at 100 meters, and that total includes patch cords at both ends. In most buildings, that means a 90-meter permanent link plus 10 meters of cords.
Patch cords deserve a closer look. Most use stranded wire, which has more resistance than the solid copper in the wall. A few extra meters of thin, stranded cord in a crowded rack can eat into your margin faster than the horizontal run does.
If a run measures close to 100 meters, I treat it as a Type 4 risk. Then I check everything else on the run with extra care.
Why Type 4 Makes Cable Quality Visible
Type 4 pushes roughly 960 mA through each pair, about 60% more than PoE+. Power lost in the cable rises with the square of the current. So the losses grow much faster than the wattage does.
That’s where gauge matters. Most CAT6 uses 23 AWG conductors. Most CAT5e uses 24 AWG. The thicker wire has lower resistance, runs cooler, and delivers more of the source power to the device.
So can CAT5e handle 802.3bt? Often, yes. The standard assumes CAT5e-grade cabling. A short, solid-copper CAT5e run to a Wi-Fi 7 AP usually works fine at Type 3.
I get more cautious when three things stack up: Type 4 loads, long runs, and large bundles. For new installs with those conditions, I specify CAT6 at minimum. In large bundles, I specify CAT6A, which handles heat better.
Watch for CCA Cable
Copper-clad aluminum (CCA) cable looks like copper on the outside. It’s cheaper, and it often carries a “CAT6” print on the jacket. But aluminum has about 55% to 60% more resistance than copper, and CCA doesn’t meet TIA or ISO category specs.
At bt currents, CCA runs hotter and drops more voltage. It also wears out terminations faster. I’ve seen CCA runs pass a data test and then fail under a 70W load.
If you inherit unknown cable, scrape a conductor. Silver under the copper means aluminum. Don’t put Type 4 on it.
Heat, Bundles, and Where the Cable Actually Runs
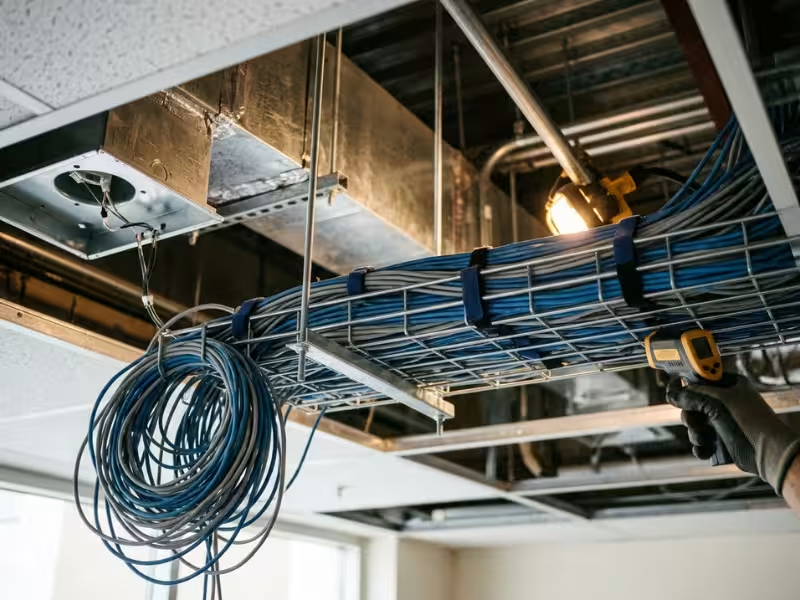
Every powered cable warms up a little. One cable alone sheds that heat easily. A bundle of 50 or 100 cables in a tray traps it, and the cables in the middle run hottest.
Hot spaces make this worse. Attics, rooftop conduits, sunny walls, and ceiling plenums above light fixtures can sit at 40°C to 50°C in summer. Copper resistance climbs with temperature, so the same cable loses more power.
Most standard cable carries a 60°C rating. At those ambient temperatures, the PoE heat from a dense bundle can bring it close to that rating.
Here’s what I do on bt jobs:
- Split large bundles into smaller groups of 24 or fewer where trays allow.
- Route Type 4 runs away from hot zones, such as attics and roof penetrations, when possible.
- Use cable rated for 75°C or higher in hot spaces.
- Avoid tight coils of slack cable behind racks. A coil acts like a small heater.
Bad terminations also cost power. A loose punch-down or a worn jack adds resistance at a single point and creates a hot spot. On Type 4 runs, I re-terminate any connection that looks marginal before I blame the injector.
Before you approve a run for a 90W device, certify it with a tester. Make sure that test includes DC resistance unbalance. The cable decides how much of that 90W reaches the device.
Compatibility Checks Before You Order Anything
Most 802.3bt problems I get called about aren’t power shortages. They’re handshake problems. The injector and the device both work, but they don’t agree on how much power to share.
Three checks catch most of these issues before you spend money.
Backward Compatibility Helps, but It Has Limits
802.3bt works with older gear in one direction. A bt injector or switch will safely power an 802.3af or 802.3at device. The device asks for its class, and the source delivers only that amount. A 90W injector won’t push 90W into a 13W phone.
The reverse is different. A bt device on a PoE+ port gets only 25.5W. Some devices boot in a reduced mode. A Wi-Fi 7 AP may shut off a radio. A PTZ camera may disable its heater. Others won’t start at all.
Also check the Type, not just the “bt” label. A Type 3 injector can’t power a Class 7 or Class 8 device.
Early gear can also struggle with dual-signature devices, which power each pair set separately. If your device’s datasheet mentions dual-signature, confirm that the injector supports it.
Passive PoE Doesn’t Negotiate
Passive PoE sends a fixed voltage, often 24V or 48V, the moment you plug in a cable. It skips detection and classification. You’ll find it on some older outdoor radios, including certain Ubiquiti models, and on many low-cost cameras.
That creates two risks:
- A passive 48V injector can damage a laptop, switch port, or other non-PoE device.
- A 24V passive device on a bt injector usually won’t power on, because it never completes the handshake.
Keep passive gear on its own clearly labeled injectors. Never patch it into a bt midspan “just to test.”
LLDP and Firmware Can Change the Outcome
Many bt devices fine-tune their power request through LLDP after they boot. If the switch or midspan doesn’t understand the device’s LLDP power messages, the device may stay at a lower level. I see this most often when a site mixes vendors, such as one brand’s switch with another brand’s AP.
Firmware often fixes it. Before you replace hardware, check the release notes on both sides for “802.3bt” or “LLDP power” updates. Then update the switch or midspan first, followed by the device.
| Check item | Why it matters | What to verify |
| PoE standard and Type | Type 3 can’t power Class 7–8 | Type 4 for any Class 7 or 8 device |
| Device class at peak | Sets the real power need | Class listed on the datasheet at maximum draw |
| Signature type | Some early sources mishandle dual-signature devices | Injector supports single- and dual-signature |
| Active vs. passive | Passive PoE skips the handshake | No 24V or 48V passive gear on bt ports |
| LLDP power support | Mismatches cap available power | Both sides support bt LLDP power messages |
| Firmware versions | Updates often fix negotiation bugs | Current firmware on the switch, midspan, and device |
Spend ten minutes on this table before you order. It costs far less than a return shipment and a second site visit.
What Really Separates a Reliable 802.3bt Adapter From a Cheap One
Two 90W injectors can share the same specs on paper and still behave very differently on site. The cheap one works on the bench. The reliable one keeps working after a storm, a hot summer, or a fault on the cable.
When I compare adapters, I look at three risks: electrical stress, heat, and how quickly I can fix a problem without driving to the site.
Protection That Holds Up When Something Goes Wrong
Every port should have overcurrent, overvoltage, and short-circuit protection. A crushed cable or a failing camera should shut down one port, not damage the injector or the switch behind it.
Ask how the unit recovers. Good gear restores power automatically once the fault clears. Cheap gear often needs someone to unplug it.
Outdoor runs need extra care. 802.3bt sets a baseline for isolation and fault handling, but it won’t save a budget injector from a nearby lightning strike. For any cable that leaves the building, I look for surge protection rated at 2 kV or higher, tested to IEC 61000-4-5.
On poles and rooftops, I add an inline surge protector at both ends and bond it to a real earth ground. Without that ground, the surge rating means very little.
Thermal Design for Where It Actually Lives
Heat kills more injectors than surges do. A 90W port wastes several watts as heat. Stack four ports in a small box, and that heat adds up fast.
For offices and ceiling spaces, I prefer fanless units with metal housings. Fans clog with dust and fail quietly above a drop ceiling.
Read the datasheet’s operating range and its derating curve. Many injectors cut output above 40°C or 50°C, yet attics and unventilated closets often run hotter in summer. If a closet has no airflow, choose gear rated to at least 55°C, or plan to add ventilation.
Outdoor PTZ cameras and radios need IP65 or IP67 enclosures and a range of about -40°C to 75°C. A desk-grade injector inside a junction box will overheat in July and condense moisture in January.
Monitoring That Saves You a Site Visit
A frozen camera often needs only a power cycle. Without remote control, that fix becomes a truck roll, which can easily cost $150 to $300 once you count labor and travel.
Managed midspans earn their price here:
- Per-port power readings show you which device draws too much before it trips.
- SNMP alerts let your monitoring system flag a dropped port.
- Remote reboot lets you restart one device from your desk.
Unmanaged injectors rely on LEDs alone. Learn what each light means for your specific model. Solid green, amber, and blinking patterns vary between vendors, and a blinking light can signal an overload or a class mismatch.
If a device sits on a pole, a roof, or a high ceiling, pay for remote reboot. It usually pays for itself after the first avoided trip.
Real-World 802.3bt Setups That Make Sense
Specs only matter once a device sits on a ceiling, a pole, or a desk. These five setups cover most of the bt jobs I see, and each one hides its own trap.
Wi-Fi 6E and Wi-Fi 7 Access Points
A tri-band Wi-Fi 7 AP typically draws 30W to 40W at peak. That covers all radios, a multi-gig uplink, and an IoT radio running at once. PoE+ tops out at 25.5W at the device.
On a PoE+ port, many APs boot fine but switch off a radio or drop to fewer spatial streams. Users don’t see a power fault. They just see slow Wi-Fi.
Plan for Class 6 on a Type 3 port. A multi-gig injector works for one or two APs. For a full floor, a bt switch makes more sense.
The gotcha is data speed. A Gigabit-only injector caps a 5 Gbps uplink, even when the power side works perfectly.
PTZ Cameras With Heaters or Wipers
A PTZ camera might run at 20W to 25W in summer. In winter, the heater, IR lights, and pan motors can push it to 60W or 65W. PoE+ can’t cover that peak, so the camera reboots or the lens fogs over.
Use Class 8 on a Type 4 port. On a single pole, an outdoor-rated injector with surge protection works well. For a cluster of cameras, a managed midspan with remote reboot saves site visits.
The gotcha is commissioning in July. Force the heater on during setup, or run a cold-start test, before you sign off.
Digital Signage and Ceiling-Mounted Displays
A 32- to 43-inch PoE display with a built-in player usually draws 45W to 55W at full brightness. That alone rules out PoE+. One cable for both power and content helps most where outlets are scarce, such as lobbies, ceilings, and transit walls.
A single lobby screen or an event display suits an injector. A wayfinding network of ten or more screens belongs on a bt switch.
The gotcha is the brightness setting. Installers often test at 50%, and then someone raises it to 100%. Budget for full brightness. If the screen uses a splitter, check the current rating at the DC plug.
Thin Clients and Compact PCs
A PoE thin client often needs 15W to 25W by itself. Add a USB headset, a webcam, a keyboard, and a card reader, and the total can reach about 42W. PoE+ handles the bare unit, but the peripherals push it over.
Plan for Class 6 at each desk. A bt switch in the closet fits office rows far better than an injector under every desk.
The gotcha is bus-powered USB gear. Someone plugs in a portable drive, and the client resets. Set a peripheral policy, or budget for the full USB port output.
Building Systems and Access Control
Most single readers and basic intercoms run fine on PoE+. 802.3bt comes in when one cable powers a door controller plus its locks, or a video intercom with a heated outdoor housing.
A controller driving two maglocks can need 30W to 50W. PoE LED lighting fixtures can also pass 40W each.
These devices usually share one closet, so a bt switch or midspan works best. Save injectors for a remote gate or a single door.
The gotcha is fail-safe locks. If the port drops, a fail-safe maglock releases the door. Put the switch or midspan on a UPS, and confirm the lock behavior with the security team.
| Use case | Typical draw pattern | Best power option | Common mistake |
| Wi-Fi 6E / Wi-Fi 7 AP | 30–40W peak with all radios active | Type 3 injector for 1–2 APs, bt switch for a floor | Gigabit injector on a multi-gig AP |
| PTZ camera with heater | 20–25W in summer, 60–65W on cold nights | Outdoor Type 4 injector or managed midspan | Testing only in warm weather |
| Digital signage / ceiling display | 45–55W at full brightness | Injector for one screen, bt switch for a network | Budgeting at test brightness |
| Thin client / compact PC | 15–25W base, up to about 42W with USB | bt switch in the closet | Ignoring USB peripheral draw |
| Access control / building systems | 30–50W with locks or heated housings | bt switch or midspan on a UPS | No backup power for fail-safe locks |
Common Objections and Honest Tradeoffs
Every bt project hits a few objections before anyone signs off. Some of them are fair. Others come from older PoE gear or from bad installs. Here’s how I answer the four I hear most.
“An Injector Is Less Reliable Than a PoE Switch”
That’s true at scale. Ten injectors mean ten power bricks, ten outlets, and ten more failure points. They also give you no monitoring and no shared UPS feed.
For one or two devices, the picture changes. A quality injector has fewer parts than a switch power supply. If it fails, you lose one device. If a switch PSU fails, every port goes dark.
Reliability depends on how many devices you power, not on the box type.
“Why Not Just Run an AC Outlet?”
An electrician’s run to a ceiling or pole often costs $300 to $1,000 or more per location. Conduit, permits, and lift rental can add more. A good Type 4 injector usually costs $60 to $200, and you already need the data cable.
Backup power matters too. One UPS in the closet keeps both the data and the power running. A ceiling outlet almost never sits on a UPS.
AC still wins in two cases. Run AC when a device needs more than 71.3W, or when the run goes past 100 meters.
“Higher-Power PoE Sounds Risky”
The standard won’t send power blindly. The source first checks for a valid device signature. Then it reads the device’s class and supplies only that amount.
If the device disconnects or a fault appears, the source cuts power within milliseconds. The voltage stays below 57V DC, which falls within the safety extra-low voltage range.
The real risks come from installation shortcuts. These include CCA cable, oversized hot bundles, and loose terminations. Use solid copper, keep bundles small, and test every run. With those basics in place, a bt run stays well within safe limits.
“I Can Just Add Injectors to My Current Switch”
Often you can, but check three things first.
- Data-only input: Injectors need a data-only input. If the switch port already supplies PoE, disable PoE on that port, or confirm the injector accepts a powered input.
- Shared switch budget: A switch’s own PoE ports still share one power supply. A “bt-ready” switch might list 90W per port and only 370W in total.
- Closet UPS capacity: Six 90W injectors can pull roughly 600W from the wall once you count conversion losses. Many small closet UPS units can’t carry that load.
How to Choose and Deploy Without Guessing
Good bt installs follow the same order every time. I work from the device back to the closet. Then I prove the plan on site before anyone closes a ceiling tile.
Here’s the routine I use on every job.
Start With the Device, Then Pick the Gear
Pull the datasheet for every powered device before you open a single product page. Find its maximum draw and the PoE class it requests at that peak. A PTZ camera that lists “Class 6 typical, 62W max” needs a Class 8 plan, not Class 6.
That class decides everything else. Class 5 or 6 points to Type 3 gear. Class 7 or 8 needs Type 4.
Only then should you choose between an injector, a midspan, or a bt switch. Let the number of devices in each closet make that call.
Budget the Ports and the Box
Add 15% to 20% headroom to each device’s peak, and size the port from that number. Then add up every port and compare the sum with the unit’s total power budget, not its per-port rating.
I aim to stay under 80% of the total on day one. That way, next year’s AP has somewhere to go.
Prove It Under Full Load
Plans on paper fail in the field for physical reasons. Before you mount anything, confirm three things:
- Cable: Use solid-copper CAT6 or better for Type 4 runs. Keep the full channel under 100 meters, including patch cords.
- Environment: Make sure the ambient temperature at the injector and along the cable stays inside the gear’s rated range in summer.
- Load: Make sure the device survives its worst hour on the bench or the ladder.
That last check matters most. Pan and zoom the PTZ with the heater forced on. Light up every radio on the AP. Set the display to full brightness.
Let the device run for at least 15 minutes while you watch the port power reading. If it holds steady, mount it.
Write Down What You Built
Six months from now, someone will troubleshoot this site, and it might not be you. Record these details for every run:
- Port map
- Device class
- Measured peak draw
- Injector or switch port
- Cable certification results
Keep the record in one shared file, and tape a printed copy inside the closet door. A clear record turns a two-hour fault hunt into a ten-minute fix.
FAQ
These six questions come up on almost every bt job I plan. Here are the short answers I give installers and IT teams.
What is the difference between 802.3bt Type 3 and Type 4?
Type 3 sends up to 60W from the source and guarantees 51W at the device. It covers Class 5 and Class 6. Type 4 sends up to 90W and guarantees 71.3W, which covers Class 7 and Class 8.
Type 4 also pushes more current through each pair, so it puts more stress on your cable. Any Class 7 or Class 8 device needs a Type 4 port.
How many watts can 802.3bt actually deliver to a device?
Plan on 71.3W at most. That figure assumes a full 100-meter channel, where the cable can lose up to 18.7W of the 90W source power.
Shorter runs lose less. Still, size every device against 71.3W. If a device needs more than that at peak, give it a local AC outlet.
Can I use an 802.3bt injector with an 802.3at device?
Yes. A bt injector works with 802.3at and 802.3af devices. The device announces its class during the handshake, and the injector supplies only that amount.
The reverse works less well. A bt device on a PoE+ port gets only 25.5W. It may run in a reduced mode or fail to start.
Do I need CAT6 cable for 802.3bt?
Not always. The standard assumes CAT5e-grade cable, and a short solid-copper CAT5e run often handles Type 3 loads fine.
For Type 4 loads, long runs, or large bundles, I specify CAT6 at minimum and CAT6A in dense trays. Whatever category you choose, avoid copper-clad aluminum (CCA) cable. It runs hot and often fails at bt currents.
Will a 90W injector damage a lower-power device?
Not if it follows the 802.3bt standard. The injector first checks for a valid device signature. Then it delivers only what the device’s class requests, so a 13W phone draws 13W.
Passive PoE injectors work differently. They skip the handshake and send voltage right away, so keep them off standard ports and away from non-PoE gear.
Why is my 802.3bt device not powering on?
Start with the Type. A Type 3 injector can’t power a Class 7 or Class 8 device. Next, confirm the injector’s input port gets data only, not PoE from the switch.
Then check the cable. Look for runs near 100 meters, CCA conductors, and loose terminations. On a midspan or switch, make sure the total power budget still has room.
If the device boots but drops off under load, budget for its peak draw. On mixed-vendor gear, update the firmware on both sides to fix LLDP negotiation bugs.
Start With the Device Class, Not the Wattage on the Box
A 90W label on an injector tells you what the box can send. It doesn’t tell you what your device needs. Start with the datasheet. Find the peak draw and the class it requests, then pick Type 3 or Type 4 gear to match.
Next, budget like the cable and the weather get a vote, because they do. Plan against the power at the device, not the source figure. Add 15% to 20% headroom for heaters, motors, and startup surges. Then add up every port against the unit’s total budget.
Finally, remember that wattage is only part of a working install. A mismatched handshake, a CCA run, or a hot ceiling bundle can sink a perfectly sized plan.
So before you order anything, pull the datasheet for the hungriest device on your network. Confirm its class at full load, and build the rest of the plan from there. Once you know that number, compare it against the injectors and adapters in our product range to find the right fit.